Showing posts with label featured. Show all posts

guess what? | gossamer blue

#gossamerblue #scrapbooking #delightinthedetails

Guess what?

I'll be joining Jill Keller and some nifty contributors in the Delight in the Details class at Gossamer Blue. I've contributed a layout using the exclusive kit and the FREE stamp set, included with class registration, but will be sharing more projects here soon. Until then, find out more about the class here
Join Jill Keller and her contributors, Monika Wright, Heather Conklin, Emily Spahn, and Sabrina Alery, in Delight in the Details: a class focused on taking your layouts from good to gorgeous! Learn to layer and embellish while focusing on techniques for enhancing page backgrounds, clustering embellishments, creating dimension and all of the little things that will make your finished projects stand out and be noticed. Register now, as class begins September 28th!!

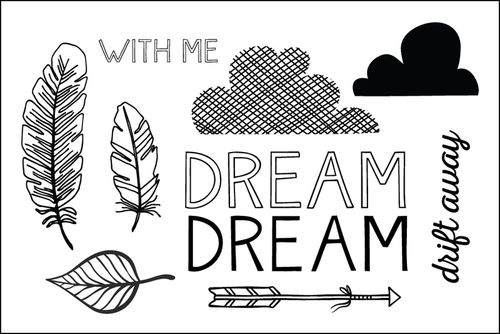
You'll receive this darling stamp set for FREE with class registration:

#feather #dream #arrow #leaf #stampset

And take a look at the awesome goodies in the kit! Oh, the possibilities.


Come join us in class on September 28th!

making cards with die cuts

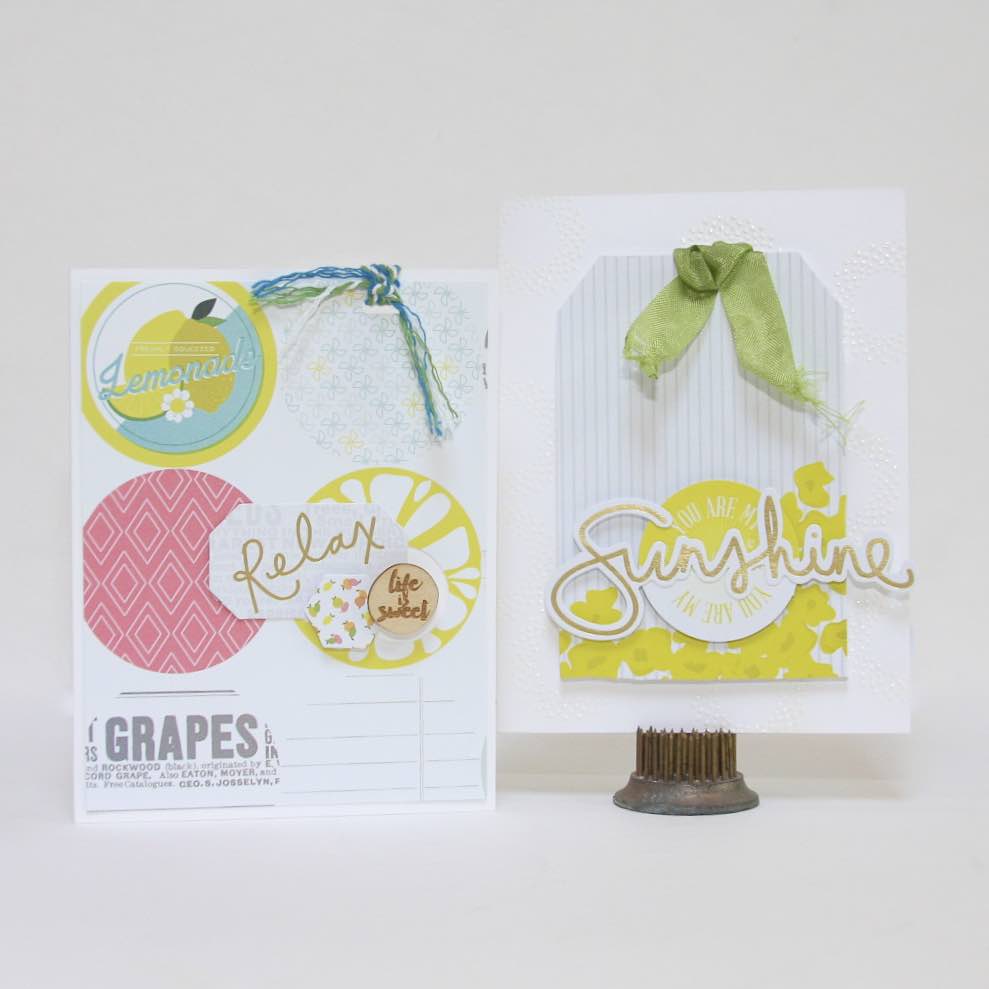
I don’t often make cards, but when I do I’m always so very happy to have done so and then go on a card making spree and make about 10 at one time. Today, I want to share two with you I created as the Guest Designer using the April Kit from Cocoa Daisy. And I’ve even included a little surprise.

#cards #easy #circles #tag

I wanted to find a way to use the limited edition Cocoa Daisy stamps and, even though I am not a technique-y type of gal, I did pull out my embossing powder and heat gun for this one! I love how the embossed polka dot circles contrast so nicely with the stripes on the tag, where I’ve added some of the green seam binding tape. I used my foam dots again to pop the tag and round die cut off the card. 


And for the surprise…I added some embellishments to the inside of the card, too! 


-----

This kit was all about circles, so I incorporated a portion of that fun patterned paper onto this card, meant to be sent to a friend that needs some encouragement. I used more of that circle paper as a journaling spot on my layout here. It may be a little hard to see, but I punched out a smaller circle from the larger yellow round shape to add in wood embellishment. And again more layers, in odd numbers for a fun pop of eye candy.


And a little splash of color never hurts either.


And for the surprise, another die cut embellishment. The paper strip is just the B side of the UPC code strip at the bottom of the patterned paper. How’s that for fun and thrifty?


You can see my entire Cocoa Daisy Guest Designer's Gallery here.

hidden journaling on scrapbooking layouts

During Spring Break this year, we went on an all girls trip to Charleston, S.C. taking my Mom along with us, to visit my oldest. Zach is 23 and carving out a life and a career of his own with a wonderful company, but that doesn’t stop me from wishing he were closer to home. So, on this layout I decided to use some of the same design principals that I used earlier to make the little time I have to actually create just for me, count. You might notice that I kept the contrasting design strip, this time it’s at the top of the page, and included more clusters and layering of embellishments. Even the photo is in the same general area, how's that for quick and easy?

#layers #scrapbooking #layout #clusters

One thing I did do this time is to hide my journaling. Using some foam dots, I popped up the 8x8 map cardstock so that I had room to tuck the green shipping tag. I sometimes use this technique when there is private journaling I want to include on the layout. But, that’s not the case here, I just thought it would be a fun thing to do, plus it allowed me to use the seam binding as well.

#journaling #hidden #scrapbooking #clusters #layering
#journaling #scrapbooking #hidden #tag

Truthfully, we only really had blue skies on the day we arrived and the day we left, but we made the most of it. Wow, Charleston is a lovely place to visit, that’s for sure. Now on to my layout…again, more clustering and this time just flat layers. The mini burlap clothespin was the perfect addition as the height of the clothespin was perfect for the space the foam dots created, plus it adds support to the cardstock as well.

#clustering #layers

I picked a handful of favorite phrases in both clear and cardstock options to cluster along the right edge of my page. I love how the gold accents add a bit of sparkle and pairs so well with the pink foam Thickers. I again used foam dots to pop up some of the embellishments, allowing others to lie flat. I even managed to add a wood embellishment to this layout because, after all, life IS sweet!

#charleston #clustering #scrapbooking
#texture #layers #clusters #scrapbooking #layout

If you'd like to view my Guest Designer's Gallery for Cocoa Daisy, you can find it here.

it's five o'clock somewhere

#pineapple #scrapbooking #layout #summer #pool #paradise

A while back, the Cocoa Daisy team invited me to design for them using their April kit and I, of course, jumped at the chance. {You can see my Guest Designer's Gallery here.} I've never subscribed to a kit club before, but I have to say that it sure was nice to have a pizza box full of goodies arrive on my doorstep. All the goodies coordinated and complemented each other well and included so many yummy embellishments.

-----

When I saw that pineapple patterned cardstock, I knew for sure that I was going to include it in a layout AND I knew exactly the photo I was going to use! So what if the photo is years old, I still love the colors and the jumble of toys in the background. Plus, it doesn’t hurt that it makes me remember the days when my babies were still babies and a day at Nana’s pool meant that Mommy was in the pool the whole day, too. No rest for me, and a icy, fruity drink at the end of the day was a really, really good idea!

I consider myself a simple scrapper, nothing too fancy. And most often, not anything that includes techniques. One thing I do love is layering my embellishments. Oh, and lots and lots of clustering bursts. Sometimes, I just stand there and start piling on the bits and baubles laying in front of me to see if they work.  In this corner, I first did the machine stitching, leaving the threads attached, to anchor the pineapple paper, the orange tag and the strip of paper leftover from when I trimmed my cardstock. And then the clustering began…I added the yellow Dotties to a paperclip and die cut and much later added the green and blue twine because it balanced the blue and green from the toy buckets that in my layout photo.


Using my circle punch, I chose a journaling-like pattern from the circle patterned paper and used it to highlight the word paradise from the pack of Ephemera. I layered the pineapple to rest on top of the Five oClock embellishment and added another Dottie. And see how I kept the contrasting strip of patterned paper when I trimmed my cardstock? Thats what I used to make the pennant shape I stitched on top of the orange tag at the top left of the page. I snuck in a bit of journaling along the right side of the page, which is kind of fun when you dont have a long story to document.


I love how I can play with color, pattern and texture and really let loose while scrapbooking doing things I wouldn’t “do” in real life. You know, like having wonky lines and loose sewing threads and polka dots on top of polka dots and slightly off color combinations. But, I love it when it all comes together and my most colorful pages always turn out to be my favorite pages.

travel journal jotter

It won't be long before we're all dreaming about summer vacations so why not take a few moments today to put together a few travel journal jotters. It's a quick and easy project that you'll be glad to have with you on your next adventure!


When we travel, my family knows that I'm going to collect bits and baubles and shells and sand and tickets and menu's and, and, and. But, sometimes in all the collecting I forget the details. And where we went on each day, because it seems that there's not as much down time as I think there's going to be on a trip...so less time scrap than to get everything ready for the next day.


For our all girl Spring Break adventure to Charleston to visit Zach, I grabbed a scrap of one of my favorite papers, some bond paper from my printer and pulled out my sewing machine. That's right, we're going to sew together a travel journal jotter.


This isn't meant to replace the mini book I'm going to make, only to serve as a place to jot notes as you go along each day.


Take the time to embellish your pages with some sticky notes, labels, journaling cards and rub-ons, they make such charming additions to your jotter. And who knows, you may even add your jotter as an insert into your mini album once you get home and have the time to print photos and document your travels.


Be sure to include the restaurants you ate at, in case you want to go back again. And again.


What travel adventures will you soon be documenting?

good words chipboard mini album | mini albums with monika

I'll let you in on a secret, I have a crush on the Chipboard Elements from My Mind's Eye! They never fail to elevate a project to just right or even, if you dare, over-the-top perfect. Chipboard Elements add dimension, color and texture and can either take the stage as the star of the show or fall back into the chorus line and be easily as effective.

one little word mini album | mini albums with monika

The wonderful days of 2015 are now upon us. And how lucky we are to have had the gift of another new day, each and every day! It's something I remind myself of when my day just didn't go the way I had planned, it's good to dwell on the little things that can make a day a good day.

#olw #simplify #homedecor

This month's mini album project for my Mini Albums with Monika feature at My Mind's Eye is a little bit of a stretch, but as I work toward living my word of the year, which is simplify, I've been keen to use up my stash and clear my work space of the clutter. And that's how this idea popped into my head. In my effort to simplify, I've used a frame and paper I've had in my stash and documented my One Little Word in a 3D mini album

This isn't something you don't already know, but it does bear repeating...so many MME collections coordinate and blend and work so well with one another. After going through my older stacks of 6x6 Designer Paper Pads, I chose muted patterns {all of these are B side papers by the way} because I knew that I was going to use decorative elements from the current Jubilee and Just Sayin' collections.

Can I show you some detail shots?

#flair #journey #button

Flair pins are not just for pinning anymore. I used some foam dots to attach it to my decorative chipboard pennant flag.


I want to ride my bicycle, I want to ride my bike. I added this cheerful little piece of chipboard goodness just because it makes me smile. I added some enamel dots to the flowers and the wheels just because I could.

#olw #simplify #onelittleword

And now, my one little word. Simplify. Even though I've used multiple decorative elements in creating my 3D mini album, it feels calming and simple and open to me. And here's a little secret I'll share, it's hiding lots and lots of paper behind there that's not nearly as nice to look at as this cheerful piece of art.

#onelittleword #wordoftheyear #simplify #studio #office

Have fun exploring your word of the year in a 3D mini album!
Find more One Little Word posts here.

baker's twine tassel necklace | the twinery

I've been waiting to share this project for a while, I just love it. Do you ever have an outfit, but not the right piece of jewelry to go along with it? 


The possibilities are endless...you can add beads, baubles, more tassels...and I can't wait to share the tutorial with you over on The Twinery blog today.

using rub-ons in home decor

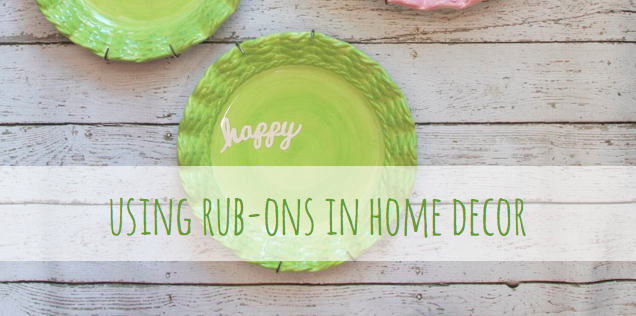
Last week, I was on the My Mind's Eye blog {I'm a Design Team member} sharing my take on their Rub On Challenge. I decided to create some darling home decor and now that I've tried it, I just want to go around and add a rub-on to anything and everything in our home.

Using Rub Ons in Home Decor | iloveitallwithmonikawright.com

And why stop at just plates? Because Victoria would notice right away that Isabella had something new, I knew that I had to find a way to spice up something in her room, too. If you have more than one kid, you'll know where I'm going with this. 


Sigh, keeping the peace, keeping the peace.

Before beginning your project, I suggest giving your plate or mirror or other object a quick swipe with some window cleaner and allowing it to dry before adhering your rub-ons.

TIPS 
  • I tested the rub-ons on the back of the plate first, just to see if it would work...and it did! I worked from above as the plates rested on my work table. 
  • I had little luck using this same technique on a curved glass vase, but I'm not giving up and will try again. I'll use smaller images, rather than the reallllly long string of hearts I originally tested with. 
  • The mirror, for some reason, was harder to do than the plates, which could have been because I was too lazy to pull it off the wall and was adhering the rub-on's at an odd angle while it was still hanging on the wall.

rub on challenge | my mind's eye

Today I'm over on the My Mind's Eye blog participating in this month's Rub On Challege sharing how I used Rub Ons from the Jubilee collection for some sweet little pieces of home decor. Or to say it better, home decor for my sweet little girls' rooms!

#homedecor #plates #rubons

Be sure to head over to the blog to enter your Rub-On projects for your chance to win! I'll be checking in and can't wait to see what you create.