digi layout | hybrid card

Meghan Mullens of Wild Dandelion Designs at Sweet Shoppe Designs has offered a freebie for all you scrapbooking fans and today our W.C.S. design team is sharing how to use digital Meghan's elements in both full digital layouts as I've done with my example and in hybrid format. I am not in any sense of the word a digi scrapper, so that just shows you that even those of us that have a low skill level can still use digi elements to their fullest.


I reduced the opacity of the background paper, added a circle element to the top left of the page {at full opacity} and added one of the patterned papers inside the circle to create my own digital embellishment to anchor the gingham bow, which is included in the kit. The thin line frame around the photo and the page were items I added. That cute cloud embellishment that comes with the kit? I used it as a journaling spot, rotating it and placing it beneath the photo layer. Pupcat is the name of the font I am using.

To showcase the beauty of using digital elements in a printed form, I made a very simple card using the add-on word art in the kit and fussy cut around the bracket shape   before adding it to some Momenta cardstock while mimicking the colors of the rainbow by tying several strands of baker's twine from The Twinery around the bracket.


I hope you'll download the freebie and try your hand at some digital and hybrid projects soon. If I can do it, you can too! Head over to Write.Click.Scrapbook. {where you'll also see two layouts by Marnie Flores} for the freebie and to enter the giveaway for two gift certificates to Meghan's shoppe!

ella list it! eBook winner

The lucky commenter is:

scrapper Karen, contact me so that I can provide you with the Top Secret winner's code!

To those of you that didn't win, I encourage you to try one of the List It! eBooks from Ella Publishing. I'll be sharing more layouts in the next few weeks all inspired by, and using, the journaling prompts in the List It! series of eBooks. Good stuff.

stars and cards

July 4th, Independence Day, will be here Monday. I've never taken the freedom I enjoy for granted. Ever. My father is a 20-year Air Force veteran. My son is a new Navy recruit. My father-in-law is a proud former Marine. All of them dedicated to the notion that our country is so great that they want to serve, protect and honor her.

As old as I am, I get choked up when I say the Pledge of Allegiance. I become misty-eyed when I sing the National Anthem. {Am I the only one?} I freely admit that I am an emotional girl.

My card making spree began with this card. I've been trying to make our cards and letters to Zach a little fun and hopefully he's not too embarrassed when he opens the envelopes. 

Stars and Baker's Twine Cards | iloveitallwithmonikawright.com

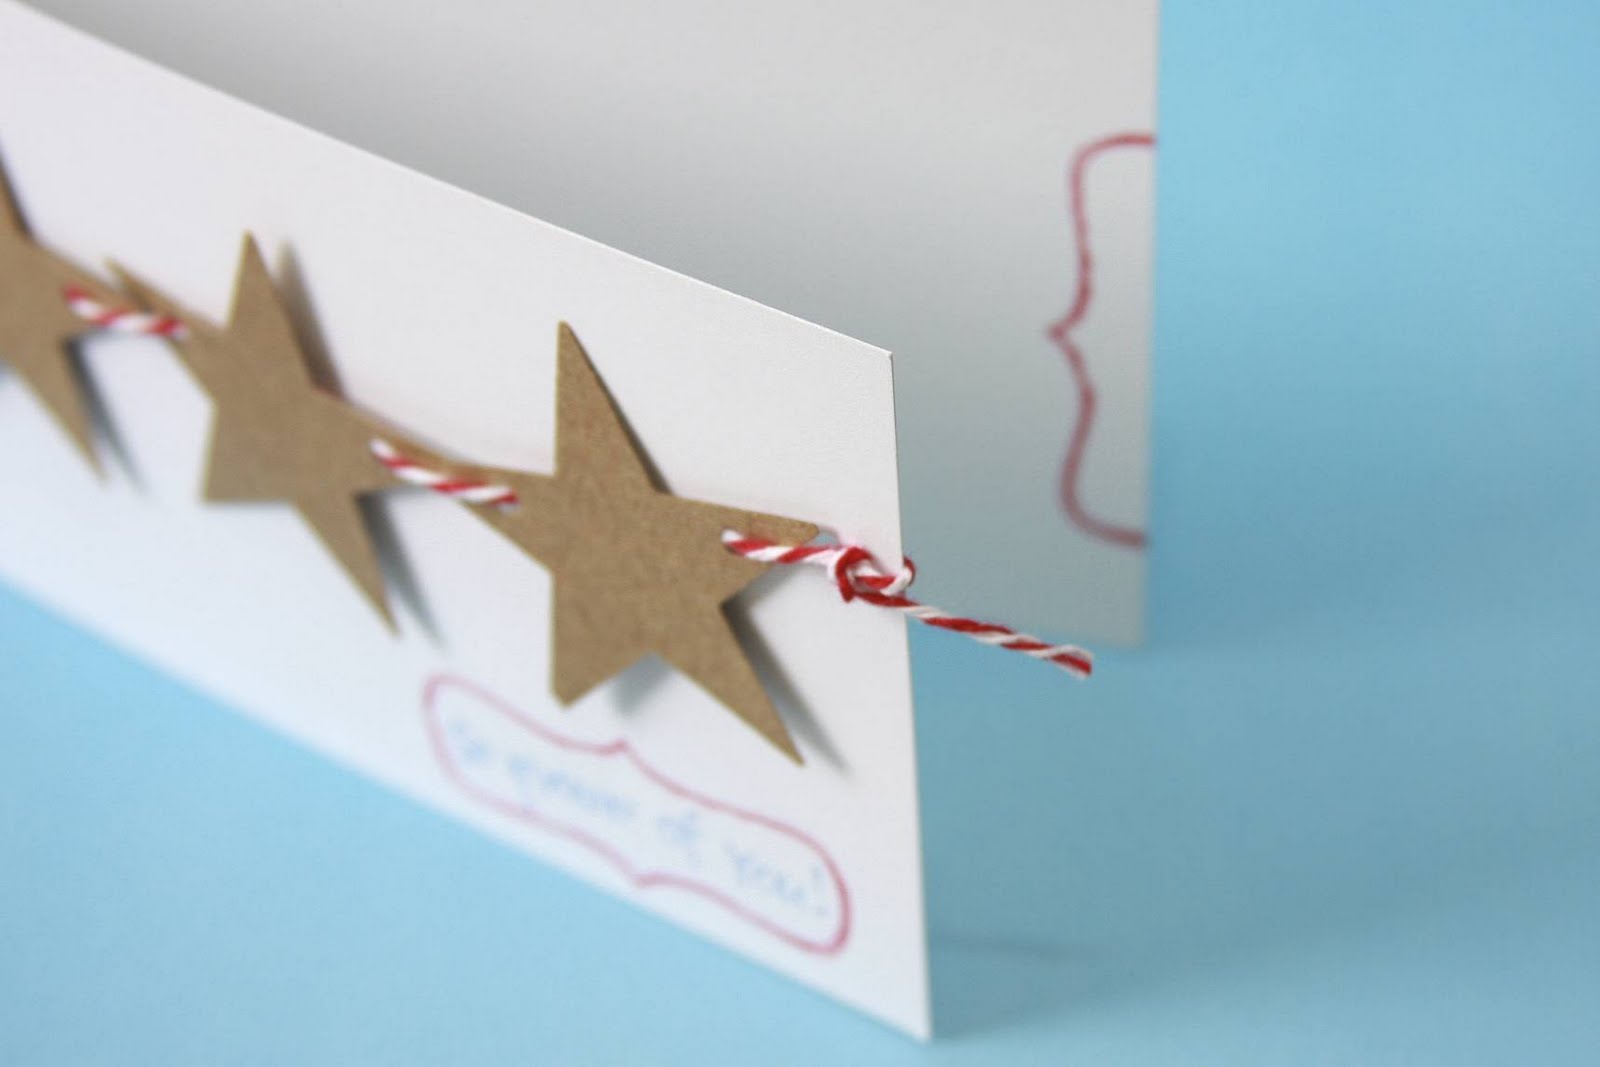
I used my new punch from Stampin' Up and punched 3 kraft stars, threaded Maraschino baker's twine from The Twinery through the holes I punched with my Crop-o-Dile and tied it to the card I made from some scrap cardstock.

It turned out so cute, that I decided that I wanted to make several cards like this to have on hand. The one for Zach, above, has "we're so proud of you" handwritten inside the journaling stamp. On the card below, I used a stamped sentiment. Now, I can use this card for a number of occasions. The die cut is the Top Note die from Stampin' Up. You can find the patterned papers used for the stars in the One Fine Day 5x7 cardstock mats pack at Momenta and the blue cardstock is also from Momenta. The Maraschino twine is from The Twinery.

Stars and Baker's Twine Cards | iloveitallwithmonikawright.com

Here I folded the Top Note die cut in half, embellished the border with more Maraschino baker's twine and stamped Zach's name showing how it could be used as a place card. Or, stamp the name of a food item if you're having a holiday buffet. I layered three punched stars with a pop dot between each layer for a little added texture and dimension.

Stars and Baker's Twine Cards | iloveitallwithmonikawright.com

Using more Momenta cardstock and patterned papers, I made these backpack notes. Actually, I made quite a few of these. Perfect for a little pick me up note of encouragement. {School begins here on August 2nd so I'll be needing these sooner rather than later!} And you know me, I'll be slipping them down inside these cute glassine envelopes.

list it


I'm sure you've all heard and seen the buzz on the Ella Publishing blog and Facebook page about the new LIST IT products. Simply amazing. I think that I could fill a whole album with layouts inspired by just the prompts from this series of eBooks. Probably two albums. 

But, I chose to try out the List It! Teen Sampler first and was even lucky enough to have this layout featured on the cover! Francine Clouden, an Ella Friend team member is also featured on the cover with her lovely layout.


The journaling prompts in this entire LIST IT! series are thought provoking. They'll make you stop for more than just a moment as you read them. You'll be tempted to drop what you're doing and write down every memory quickly so you don't forget it. Yep, they're that good!


Contributing this layout was a perfect opportunity for me to look through my vintage {Eeeeeek, am I old enough to call childhood photos vintage? Yes, you are Monika. Deal with it.} collection of family photos and found a beauty. Faded, yellowing and sporting such a stylish ensemble. And, me with that gawky slouch because I was tall and didn't want to be then.


Yep, the Ackerman kids were skinny kidlets. Much like my own kidlets. My brother is now 6"4" and very muscular. I am 5'9" and not so muscular. And, I sometimes still slouch, but not because I don't want to be tall, just a really bad habit.

I thought that the Momenta Family Forever collection was the perfect touch to add a retro feel to my page. I trimmed my kraft paper so that I could slide the LIST IT! journaling spot through the slit and then trimmed my photo to make it appear that it was a polaroid shot adding just a few embellishments. 

Would you like to try record your memories in LIST IT! form, too?  Lucky for you, Ella Publishing is letting me give away to one lucky reader a copy of either the Childhood Edition or Childhood Digi Plus eBook...winner's choice. The cover features layouts by my Ella Friends Jennifer Larson and Donna Jannuzzi

Leave a comment here today telling me if you've ever purchased and downloaded an Ella Publishing eBook. And, if you have how many eBooks do you own? A winner will be chosen Wednesday evening. Be sure to leave your e-mail address in your comment if you don't have your e-mail linked to your Blogger profile so that I can contact you quickly...the code I'll provide you expires on Thursday, so you need to be able to download your eBook by then.

home is

Home Is Where Our Story Begins Printable | Monika Wright

should be finishing up a design team assignment
should be starting dinner
should be folding the load of laundry in the dryer
should be putting another load in the washer
should be downloading videos onto my computer

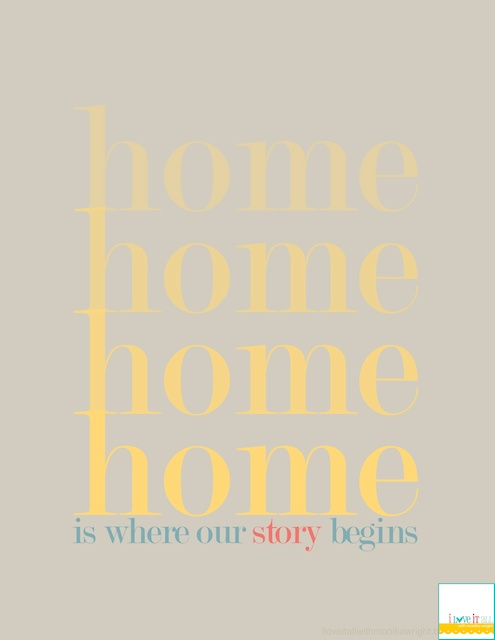
Should be, could be, but here I am playing around and here's what I came up with. If you like it, it's yours. For free. Just download it, print it and frame it. It's sized to 8.50x11, but you could easily resize it or trim it after you print. Don't worry, the I Love It All watermark won't print on your original.

Just a little thank you for sticking around with me for a whole year. Since my first post, I've made some new friends and found a place to share all my crafty little ideas. So, I thank you. Plans include a few more goodies for you in the next week, so do drop back in.

For other fun and colorful home decor and gifts, I invite you to visit my shop, I Love It All where you'll find a variety of art prints, journals & cards and custom requests are always welcomed!

It's All The Little Moments | Monika Wright

date night invite

My one and only boy is away at Navy boot camp,  so what's a girl to do with a whole pack of Boys Will Be Boys robot-themed stickers?


Make a Date Night invite for your Sweetie {aka Better Half} of course!  Gordon and I try to sneak in one Date Night a month and have been rather successful so far. This happy robot card will be his fun little reminder for July 2011.

Wondering how I made a rectangle window on the card front so that you can see the Programmed to Love sticker on the inside? With my square punch...punching and then moving down and punching the card again until the I had the perfect sized rectangle for my embossed puffy sticker. I used two layers of pop dots under the sticker to give it even more dimension.


I packaged the invite inside a glassine envelope and added another embossed puffy sticker { All Systems Go - cute right?} to a paper strip from the Family Forever line of patterned papers. See the arrow? It's the negative space left over from trimming the ends of my decorative paper strip and points out the message hidden inside.


I hope you'll have fun thinking "outside the box" when you have a handful of stickers and time to make a few cards.

love note

I am so nostalgic these days. Could it be that my oldest "baby" is off learning how to protect our country from harm's way? Could it be that my next baby keeps proudly telling us, even though she's just 8, that she feels like a teenager sometimes? Could it be that my last baby will be a Kindergartener in just 6 weeks?


That precious bit of 4-month old cuteness is our little Victoria featured in a layout from way back when. When I first began scrapbooking and didn't know a gosh darn thing about anything. NOT that I am an authority now. Not at all. I felt pretty smart to think of a way to use an extra letter "U" and to journal {even though I didn't know that's what it was called} with a boatload of stickers. And to top if off, I colored my raw chipboard with an ink pad. Oh, my how clever was I? Obviously I didn't have any brads to insert into the metal thingamajigs {still don't know what those are called} and even if I did, I didn't have a paper piercer to punch the hole for it anyway.

You've come a long way since then, baby. Okay, so it's only been 3 or 4 years. But, my oh my, do I still have so much to learn.

Note: This post has been brought to you by the awesome MacBook Air my Sweetie brought home Thursday evening. I think I'm going to like this a whole lot better than the iPad2 I had. Yep, a whole lot! So, geeks that we are, Gordon and I are sitting together in the living room, each on our Mac laptops, surfing and talking and having a good old time. No worries, I still love my 24" iMac...but it IS nice to be "working" and having a conversation with Gordon in the same room at the same time.

grosgrain ribbon belt :: a tutorial

If they've outgrown it, then just recycle. That's what we did when the belts that Victoria and Isabella had been wearing just didn't fit any more.


I trimmed the existing ribbon from the belts they were using, and had worn for many years, {my girls are skinny minnies} and recycled the D rings. If you don't have any D rings handy, you can find them here or at most craft stores.

I measured the length of ribbon that I would need to fit around the girls' waist, plus a bit more for the "tail" and then doubled the length. I threaded the D rings onto the ribbon so that they were sandwiched between the two layers.


Begin sewing from the end where the D rings are {the middle} and go out toward the open end of the ribbon. Once you reach the open end, press the ends under, as shown below.


Continue sewing to the end, make your corners...


...and head for the home stretch!


I chose red thread because the area closest to where I would be sewing was red. It's your choice on whether to choose a complementary or a contrasting thread color for your belt.

And now, Spunky and Precious have new belts to wear and it didn't cost DaDa a cent! Well, I guess at one point it did, but the ribbon is now considered "free" because it's in my stash. So there.

One is silver and the other's gold...name that Girl Scout song.

My machine is old {from my Mom} and my sewing is not perfect, but I had fun. Now, if I would just finish the table runner for my Mom and the pillows for Victoria's room my TO DO list would be so much closer to done!

52Photos :: square :: polaroid :: blue :: tradition

Summer has officially kicked me in the hiney, so here is a catch-up post on my latest 52Photos captures.

my 52Photos capture :: square


Isabella and Victoria were outside playing and wondered what to do next. I suggested hopscotch, knowing that it would be a game would could play in the shade on this hot and humid Summer day! Even though Victoria is 27 months younger than Isabella, she seemed to do a better job at hopping the squares but they both enjoyed it equally well and Duke just enjoyed having us outside for company. Plus, we all like playing with chalk!

my 52Photos capture :: polaroid


Polaroid, the word, brings back an era of days gone by. And this picture isn't all that old, really, but it does bring back memories, for me, of days gone by. Days when my girls were still needed me for so many things. Days when they spent each waking moment together. In less than 6 weeks, both my girls, my last babies, will be in school all.day.long. I'll be home alone. Alone. Alone for the first time in 8 years. No one calling Mommy several times an hour. No one asking for a snack several times a day. No one needing a crayon sharpened or a story read.

my 52Photos capture :: blue


This photo is years old but so captures the theme of blue for me that I can't imagine another photo taking its place. This is the view we have as we drive to the top of our driveway each day. Granted, the sky is not always so blue or the clouds so puffy and white. But, the view is always as glorious and breathtaking. To think that I get to live where I live is really so amazing. That wonderful Mr. wRight brought me to a beautiful part of his world.

my 52Photos capture :: tradition


For 13 years, it has been a tradition that Zach gets to be the first one to jump into the pool at Nana's and Papa's. Really, for the last 10 years, no one really wanted to be the first one to jump in the pool...we were all quite happy to allow Zach the honor. Up until a few years ago, the pool wasn't heated so the water was way too chilly for me, anyway! The last 3 years or so, Isabella has been aching to have the "first jump" honor. Well, this year it was bittersweet. She did get to be the first jumper of the season, but Zachi wasn't there to see it. We did capture this photo {Isabella wanted to be sure I got her peace sign pose} as Isabella starts the next generation of first to jump. I'm thinking that next year, Victoria is going to fight for her place as first jumper of the season, don't you?

next week's theme

body

the wrap-up

Whew! I'm caught up...at least until next week. Lots of new photos and new prompts as we head into warmer days and longer nights...at least here in the U.S. What's the weather like where you live?


Ghere for an explanation, a blog button and an invitation to join our 52 week journey of discovery! We'd love to have you join us...just jump in now and see where your photos take you.

big picture classes | giveaway


Colour! Or is it Color?  Join Nic Howard as she uses instructional videos, handouts and audios to guide you through a variety of techniques to create stunning scrapbook pages. If you want to be part of a workshop full of fun colour theory, techniques and step-by-step assignments to extend the way you include colour in your projects, then Nic is here to help you achieve your creative scrapbooking goals!

This six-week workshop can be yours for FREE! Big Picture Classes is kindly offering one I Love It All blog reader a free pass to this amazing class with Nic Howard.

To enter, leave a comment on this post and share with me if you've ever taken a class with Big Picture Classes in the past and if you have, leave an extra comment with  how many classes you've taken. But, be sure and comment before Friday at Noon. Winner will be announced Friday evening and it is the winner's responsibility to contact me or another winner will be chosen.


Colours reflect our mood and fill our scrapbooks; it's time to celebrate the colors we use!

Do you love colour? Would you love to improve the way you use colour in your projects?  Do you want to immerse yourself in a workshop that takes you through a whole rainbow of possibilities? RedOrangeYellowGreenBlueIndigo and Violet… colours are all around us!


Join Nic Howard as she uses instructional videos, handouts and audios to guide you through a variety of techniques to create stunning scrapbook pages. If you want to be part of a workshop full of fun colour theory, techniques and step-by-step assignments to extend the way you include colour in your projects, then Nic is here to help you achieve your creative scrapbooking goals!

The class duration is six weeks and begins June 30th. Click here for all the details on the class and how to connect with Nic on her blog.

This six-week workshop will emphasize design and textural techniques while visiting colour concepts and moving through each colour of the rainbow. Each new week will encourage you to use a new colour, with an abundance of inspiration, exciting techniques, and step-by-step instruction. Backed up with gorgeous artwork examples and the lighthearted mood that Nic is known for, this is one class you won't want to miss!

the two of us

the two of us mini album | iloveitallwithmonikawright.com

13 years and two days ago, the two of us became Mr. and Mrs. Wright. June 6th, 1998 to be exact.

the two of us mini album | iloveitallwithmonikawright.com

This tiny little mini album was a project created during my hosting week at Write.Click.Scrapbook. featuring Jenni Bowlin Studio products. Here's where you can find the red book binder rings.

the two of us mini album | iloveitallwithmonikawright.com

Oh, and here's the page where Gordon filled in his part of the mini. Trust me, huge bucketfuls of bonus points were awarded to Mr. wRight for adding his "he said" thoughts to this mini!

the two of us mini album | iloveitallwithmonikawright.com
Who says that there has to be photos in a mini anyway? Just grab a pack of journaling cards, some pretty paper and ribbon and go to town with whatever memories come to mind. You might surprise yourself!

You can find more lovely LOVE mini books in the shop.

Okay, so here's one photo. Meet our little family on our wedding day. I did a poor job of scanning and I haven't yet touched it up, but we're in our wedding day finery on one of the bridges at my in-law's house.

the two of us mini album | iloveitallwithmonikawright.com

always


This layout is an example of one layout done three times, one for each of the kids. Each of the layouts has a similar design but the embellishments are changed up for each kidlets' personality. 

My thinking on this concept? I keep an annual photo album, but not a family scrapbook. There's a WE album for Gordon and I that houses 8.50x11 layouts. There are numerous albums for each of the kiddos, different color for each kiddo, that houses a variety of layout sizes. 

So if I have a photo that has all three kids in the photo, and it is scrapworthy, I usually make the "same" layout three times so that each of them will have the story documented in their own albums. 

That's my story and I'm sticking to it!

gift bag for dad

Is it a layout...


...or a gift bag? It would be a great starting point for a layout, sure, but in this case it's a gift bag crafted with two sheets of 12x12 patterned paper and a few scrap pieces from the 12x12 Forever Family Premium Paper Pad. The FOR sticker was cut down from the Together FORever sticker in the Forever Family Embossed Stickers set. My paper scraps were fancied up with by Threading Waters Fiskars border punch and a Martha Stewart punch I don't know the name of.

Do you like the way the t-shirt we made for our Number One Dad {with the free download available in the sidebar} coordinates so well with this paper line? Pretty cool, right.


After inserting the t-shirt inside the gift bag, I used a short zig zag stitch to keep it closed...no peeking allowed. Not that Gordon is a peeking kind of guy. Now me, I'm the world's biggest snooper! If you don't like sewing, use your favorite adhesive around the paper edges and staple the top of the bag closed. 


You can also find this project featured here today! Go now AND be sure to become a Follower, then come back here and comment telling me you are a Momenta Blog Follower and you'll be entered to win a goody bag full of random scrappy goodies from me.